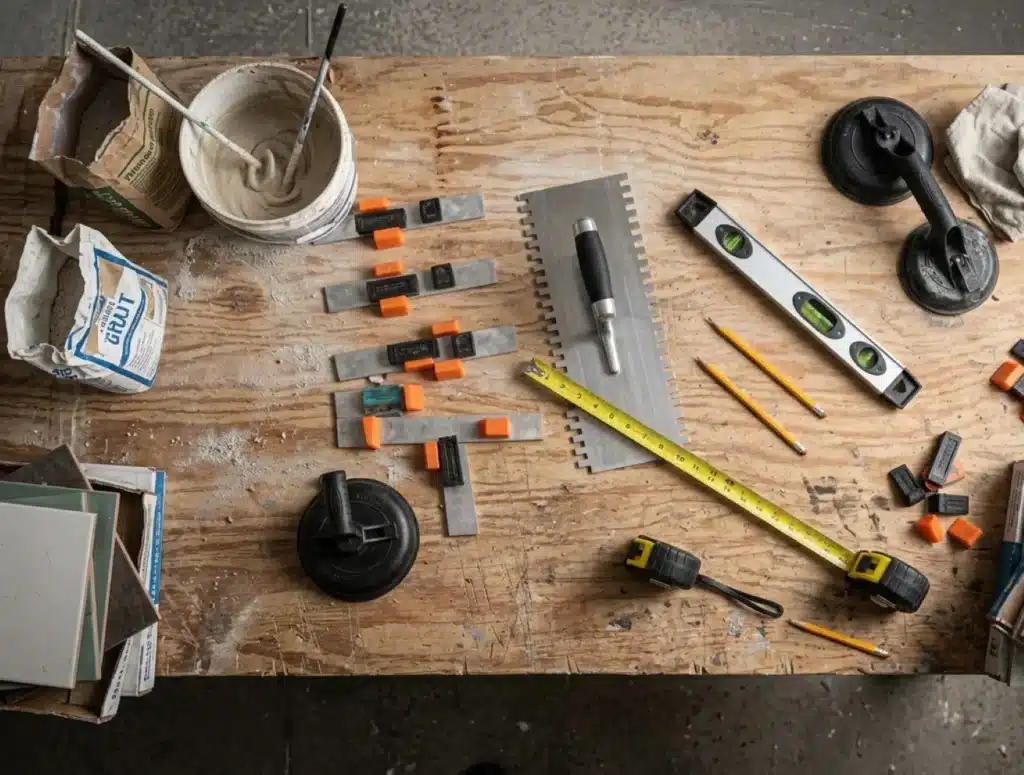
Walk into any big-box home improvement store like Home Depot or Lowe’s, and the tile aisle will immediately steer you toward premium, contractor-grade tools. Brands such as Rubi, DEWALT, and Sigma have earned strong reputations among professional tile installers for their durability and precision. For contractors who rely on these tools every day, the higher upfront cost can often be justified.
But what if you are a homeowner tackling a single guest bathroom or a kitchen backsplash over the weekend?
Before choosing your installation tools, it’s equally important to choose the right tile for your project. If you’re still deciding on materials, check out our guide on How to Choose the Right Bathroom Tiles: Balancing Style and Practicality.
Once you’ve selected your tile, if you are learning how to install bathroom tiles step by step, you’ll quickly realize that the cost of tools can easily eat up all your DIY savings. At the same time, buying the absolute cheapest junk on Amazon or Temu is a recipe for disaster. Flimsy tools flex, break mid-job, and ruin expensive tile, costing you more in wasted materials and frustration.
The key to buying affordable tile tools is learning how to evaluate their specifications rather than focusing on the brand name. Here’s how to evaluate the build quality, materials, and mechanics of budget tile tools so you can confidently choose the right equipment for your next DIY tile project.
1. Notched Trowels: Count the Rivets, Ignore the Polish
A notched trowel is the most heavily worked hand tool in any tiling project. Combing through sticky, heavy thin-set mortar requires significant physical leverage. If your trowel fails, your entire project grinds to a halt. The difference between a $3 disposable trowel and a $15 lifetime budget tool comes down to how the handle connects to the blade.
While choosing a durable trowel is important, proper installation techniques matter just as much. The Tile Council of North America (TCNA) Handbook is widely recognized as the industry reference for tile installation methods and best practices.
- What to Avoid: Stay far away from trowels where the handle shank is simply glued or minimally welded (usually indicated by just one or two tiny weld marks) to the flat steel blade. Under the high-vacuum suction of wet mortar, these weak joints will snap right off, often within the first hour of work.
- The Spec to Look For:
- Through-Riveted Shanks: Look at the underside of the blade in the product photos. You want to see distinct, heavy-duty rivets—ideally several through-rivets—compressing the handle shank directly to the blade. Riveted connections generally provide better resistance to repeated lateral stress than lightly welded joints.
- Stainless Steel vs. Carbon Steel: Ensure the blade specification explicitly states “Stainless Steel.” Cheaper carbon steel trowels will rust if you do not dry them meticulously after washing. Rust residue may stain nearby grout or tile surfaces if the trowel is stored while still wet.
2. Manual Tile Cutters: Rail Rigidity and Bearing Count
A manual snap cutter is your primary weapon for straight cuts. Cheap cutters are notorious for crushing tile edges or breaking tiles in jagged, diagonal lines. This isn’t because manual cutters are bad; it’s because the frame is flexing.
- What to Avoid: Avoid cutters with a single, thin round rail. When you push down on the breaking handle to snap a scored tile, a weak rail will deflect (bend downward) by even a fraction of an inch. That tiny flex absorbs the pressure, causing the tile to shatter unpredictably instead of snapping cleanly.
- The Spec to Look For:
- Dual Chrome-Plated Steel Rails or Cast I-Beams: Look for heavy, solid steel dual-rail systems or a thick, single aluminum I-beam rail. These solid metal geometries minimize flex so more of your force reaches the scoring wheel and breaker feet.
- Metal Ball-Bearing Carriage: The slide block (the part you push) should glide on actual metal ball bearings, not plastic bushings. Look for “bearing-guided carriage” in the product description. This ensures the scoring wheel moves in a perfectly straight, vibration-free line, resulting in straighter, more consistent score lines.
- Evaluate Extra Features Carefully: Built-in laser guides are sometimes emphasized in marketing for budget models. However, if the rail flexes or the bearings have play, an alignment laser will not prevent a poor cut. Structural rigidity and a smooth carriage are generally more important than built-in laser guides.
3. Tile Leveling Systems: Material Consistency and Clean Break-Offs
If you want a professional-looking tile job with zero lippage (uneven tile edges), a tile leveling system (clips and wedges) is non-negotiable. Because the clips are embedded in the mortar and broken off, they are one-time-use consumables, making them a prime target for budget shopping.
- What to Avoid: Avoid bulk-pack clips made from low-grade, recycled black or dark grey plastic. Recycled plastic is highly brittle. When you slide the wedge in and tension it with the leveling pliers, cheap clips will snap prematurely before the tile is level, forcing you to pull the tile back up to replace the clip.
- The Spec to Look For:
- Material Consistency: Many manufacturers use virgin HDPE or nylon because these materials generally provide better consistency and toughness than low-grade recycled plastics, reducing the risk of premature clip failure.
- Engineered “Easy-Snap” Score Lines: The base of the clip must have a precision-molded V-notch or engineered weak point just below the tile line. This ensures that when you strike the clip with a rubber mallet the next day, it breaks cleanly below the grout joint. Cheaply made clips will tear rather than snap, leaving ugly plastic “ears” sticking out of your grout lines that you’ll have to tedious scrape out with a utility knife.
4. Mortar Mixing Paddles: Protect Your Drill with Hex Shanks
Thin-set mortar is incredibly dense and sticky. Trying to mix a 50-pound bag of mortar by hand with a trowel is exhausting and leads to dry pockets that ruin tile adhesion. When selecting thin-set mortar, look for products that meet ANSI A118 performance standards, which indicate the mortar has been tested for tile installation performance and bond strength.
- What to Avoid: Never buy lightweight, thin-wire paint mixers or plastic-headed paddles. They cannot handle the viscosity of thin-set. The paddle will warp, and the extreme resistance will cause your drill motor to overheat and burn out.
- The Spec to Look For:
- Welded Helical/Ribbon Steel Head: The paddle head should feature a heavy-duty, continuous steel ribbon design. A helical design pulls the dry powder from the bottom of the bucket up into the water, creating a smooth, peanut-butter-like consistency without introducing excessive air bubbles.
- Hexagonal Shank: Ensure the shaft has a 5/16″ or 3/8″ hex shank rather than a smooth round shaft. A round shaft may cause the drill chuck to slip or wear more quickly under heavy loads. A hex shank locks securely into place, transferring torque more efficiently.
- Keep the Diameter Under 4 Inches: Unless you are using a dedicated, high-torque low-RPM mixing drill, keep the paddle head diameter between 3 to 4 inches. Larger heads (5+ inches) draw too much amperage and can place excessive strain on a standard cordless or corded DIY drill, especially when mixing large batches.
- Follow Professional Ratios: Always follow the mixing ratio, mixing speed, and slake time recommended by the mortar manufacturer. Even the highest-quality mortar can underperform if it is mixed incorrectly.
5. The 3-Step Online Spec-Checking Formula
When shopping on Amazon, eBay, or direct-import sites where product descriptions are often translated poorly, use this 3-step formula to filter out the garbage:
Step 1: Evaluate Tool Weight with Context
For manual tile cutters, additional weight often reflects thicker rails or a more rigid base. While weight alone doesn’t determine quality, it can be a useful comparison point between otherwise similar models. If you are comparing two $40 manual tile cutters, look at the “Item Weight” or “Shipping Weight” in the technical details. If two similarly priced cutters have comparable specifications, the heavier model often indicates a more rigid frame. However, weight should always be considered alongside build quality and customer reviews.
Step 2: Inspect Real Customer Photos for Weld Quality
Ignore the highly polished, 3D-rendered main listing images. Scroll down to the customer review section and filter by “with images.” Zoom in on the critical joint areas: the weld seams on the mixing paddle, the hinges on the tile cutter, and the rivet points on the trowel. Look for clean, continuous welds rather than messy, bubbled “solder” jobs.
Step 3: Run from “Multi-Function” Gimmicks
A budget tool should do one thing exceptionally well. If a listing promises that one tool can perform numerous unrelated tasks, approach it cautiously. Look for straightforward, durable, single-purpose tools. A budget-friendly tool that focuses on robust, simple mechanics will typically outlast a multi-tool that tries to do everything.
6. The Real ROI: Calculate Your DIY Savings vs. Hiring a Pro
As mentioned earlier, if you are not careful, the cost of tools can easily eat up all your DIY savings. However, by applying the spec-reading secrets above, you can assemble a high-performing kit of budget tile tools for a fraction of the cost of premium brands.
Choosing the right tools is only part of the equation. Before deciding whether to buy or rent your equipment, it’s worth estimating the true cost of a DIY project compared with hiring a professional installer.
But exactly how much money does the DIY route actually save you?
Before you start adding items to your cart, use our Tile Project ROI Visualizer below. Simply plug in your project size, select the specific tools you plan to buy or rent, and compare your total estimated DIY cost directly against a standard professional contractor’s quote. It even calculates your future savings if you decide to tackle another room later!
Tile Project ROI Visualizer
Summary: Buy the Spec, Not the Logo
By this point, you should have a better idea of which tools are worth buying and which specifications actually matter. If you’re ready to put those tools to work, our How to Install Bathroom Tiles Step by Step guide walks you through the entire installation process from start to finish.
A successful DIY tile project isn’t about buying the most expensive tools—it’s about understanding which specifications actually affect performance. By focusing on build quality, rail rigidity, bearing systems, stainless steel components, and material standards instead of brand names alone, you can build a reliable toolkit of budget tile tools without overspending.
Whether you’re renovating a bathroom floor, installing a kitchen backsplash, or tackling your first tiling project, spending a little extra time reading specifications for budget tile tools can save money, reduce frustration, and help you achieve professional-looking results. The key is learning how to evaluate specifications objectively instead of assuming that the highest-priced tool is automatically the best choice. Ultimately, no specification guarantees long-term performance, but understanding the features that affect durability and usability can help you make a more informed purchasing decision.
Note: Product quality varies significantly between manufacturers, even among tools with similar specifications. Always review the manufacturer’s specifications, warranty information, and customer feedback before making a purchase.
Further Reading
If you’d like to learn more about professional tile installation standards and best practices, these industry resources are excellent references:
- Tile Council of North America (TCNA) Handbook – The definitive guide for industry-standard tile, glass, and stone installation methods.
- Ceramic Tile Education Foundation (CTEF) – Offers professional-grade educational resources and certified tile installer guidelines.
- ANSI A108/A118 Standards on ANSI Webstore – Complete national standard specifications for the installation of ceramic tile and material quality.
Frequently Asked Questions
Are budget tile tools good enough for DIY projects?
Yes. Many budget tile tools can deliver excellent results when you focus on build quality and physical specifications instead of brand names. Focus on structural rigidity, rivet counts, and material quality rather than paying a premium for a brand logo.
How much should I spend on budget tile tools?
For a typical bathroom or backsplash project, a carefully selected set of budget tile tools is often sufficient. Spending more on structural quality rather than extra features generally provides better value for occasional DIY use.
Can off-brand budget tile tools last for multiple projects?
Yes. While inexpensive tools are not always designed for daily professional use, many well-built off-brand budget tile tools can easily handle several home renovation projects when properly cleaned and maintained. Paying attention to construction quality and specifications is usually more important than focusing on the logo.
Do expensive tile tools always perform better than budget tile tools?
Not necessarily. Premium tools often provide better durability for daily professional use, but many budget tile tools deliver excellent results for DIY projects when they have the right specifications and build quality.
Can a cheap manual tile cutter cut porcelain tile?
Yes, but only if it has the right specs. Porcelain is incredibly hard, so the cutter must have a rigid, non-flexing rail system (like a dual-steel rail or cast I-beam) and a ball-bearing carriage to score a clean line without shattering the tile.
Is renting tile tools better than buying them for a one-time project?
It depends on the tool. Expensive equipment such as wet tile saws is often more economical to rent, while affordable hand tools like trowels, mixing paddles, and leveling systems are usually worth purchasing because they can be reused for future projects.
What size notched trowel should I use?
The correct notch size depends entirely on the size and thickness of your tile. For example, small mosaic tiles typically require a 3/16″ V-notch trowel, while standard 12″x12″ tiles usually need a 1/4″ x 3/8″ square-notch. Always refer to your mortar manufacturer’s guidelines to ensure proper coverage.
Why is a tile leveling system important?
A tile leveling system is crucial for eliminating “lippage”—the uneven vertical edges between adjacent tiles. It holds the tiles perfectly flat and locked in place while the thin-set mortar cures, which is especially important for large-format porcelain or ceramic tiles.
What should I look for when buying budget tile tools online?
When shopping online, pay attention to measurable specifications rather than promotional claims. Features such as stainless steel construction, rigid rail systems, metal bearings, and high-quality plastics are usually better indicators of long-term performance than brand recognition alone.
Ready to Plan Your Tile Project?
Every project is different, and the most cost-effective approach depends on your budget, project size, and the tools you already own.
Before making any purchasing decisions, spend one minute with the Tile Project ROI Visualizer above. It can help you compare buying, renting, and hiring costs before you spend a dollar.
Have questions about a specific tile cutter, trowel, or leveling system? Leave a comment with the product name or a link to the listing. We’ll help you interpret the specifications, compare the build quality, and identify potential red flags before you buy.